First microservice
Development of a basic Java-based microservice
Objective
Set up a managed project structure, and create a cloud native Microservice that you can test, and deploy directly into your local Kubernetes cluster.
For more of a high level breakdown on the philosophy around a desirable development loop, see Delivering Software.
Prerequisites
- Tools setup
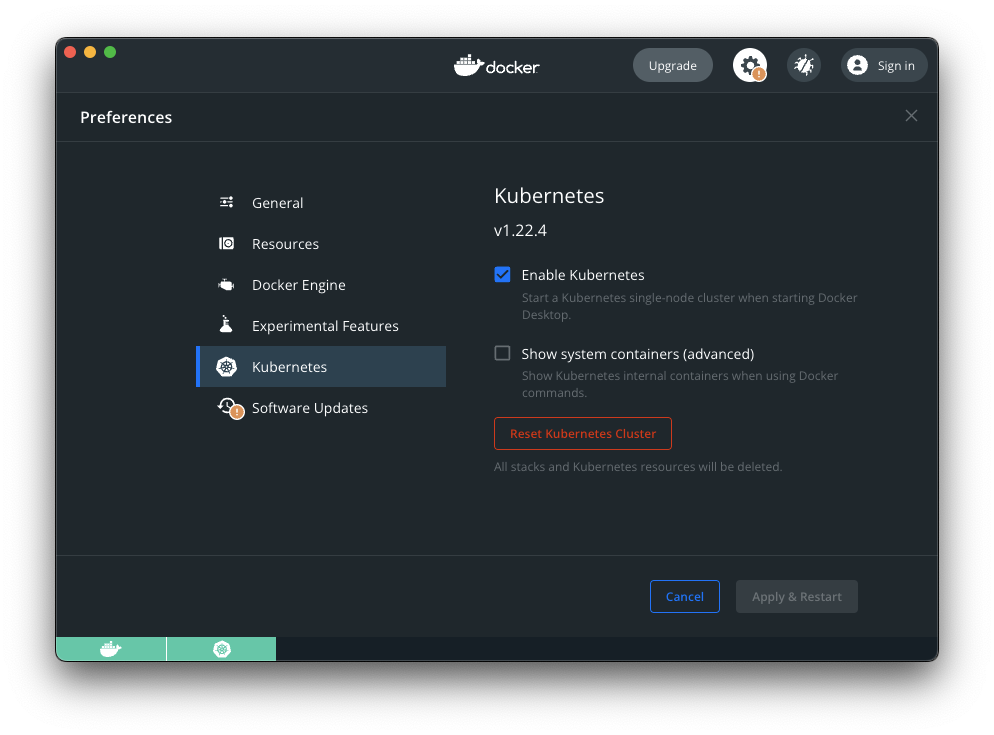
- Enable Kubernetes within your Docker for Desktop instance:

Step-by-step
Microservices are small, independent services that can be deployed and scaled independently. They are the building blocks of modern cloud native applications. In this tutorial, you will create a simple Microservice that you can test and deploy directly into your local Kubernetes cluster.
With smaller services, reusable patterns become very important. The ‘common’ layer of a microservice should ideally solve the following problems:
- How do you handle configuration?
- How do maintain consistent logging?
- How does the service start up?
- How do you determine whether the service is healthy and ready to receive traffic?
There is more to this list. But let’s focus on these for now.
With the Practiv framework, we aim for a lot of these problems to be solved out of the box, while offering the flexibility to build in the way you choose to.
1. Scaffold the project
Clone the starter project from GitHub. You can choose either a Micronaut or SpringBoot starter, depending on your preference.
Micronaut starter
git clone https://github.com/practiv/practiv-micronaut-starter
example-service-12. Set up project and access
Let’s add this simple example-service-1 to our managed Git projects. For this we use a tool
called Branchout.
Branchout allows us to manage multiple Git repositories in a single place and is one of the primary tools Practiv supports to encourage a consistent development environment. It also helps automate the ‘access’ to Nexus and Docker registries - which helps drastically in onboarding new team members in a consistent way.
We need a branchout control project. This is basically a repository with a list of other repositories to manage for you, and some config.
If you already have a branchout control project, you can skip this step.
Creating a control project
1. Create a new repository on GitHub called my-project or a custom name of your choice.
2. Add a file called Branchoutfile to the root of the repository with the following content:
BRANCHOUT_NAME=my-project
BRANCHOUT_DOCKER_REGISTRY="docker.build.practiv.io" # Replace with your own registry
BRANCHOUT_MAVEN_REPOSITORY="https://maven.build.practiv.io/repository/practiv-maven" # Replace with your own registry
BRANCHOUT_NPM_REGISTRY="https://npm.build.practiv.io/repository/practiv-npm/" # Replace with your own registry
3. Add a file called Branchoutprojects to the root of the repository
branchout add example-project-2
4. Commit these files and push them to your Git main branch.
For a richer guide on Branchout. See the Getting Source Code section of the docs.
Adding the new project
Add this project to be managed by Branchout
branchout clone example-service-1
This will add a record to your Branchoutprojects file, and clone the repository. You can now commit and push this change to the control project.
The idea here is that you can now manage all your projects in a single place, and have a consistent way to access them. New joiners who need access to the project can simply clone the control project and pull everything they need to get going.
Set up your access
Run the following command, and follow through the steps to set up your access to Maven and Docker registries.
branchout maven settings
branchout pull will clone any projects not currently checked out, and update any project that is already checked out.3. Understand the dependencies

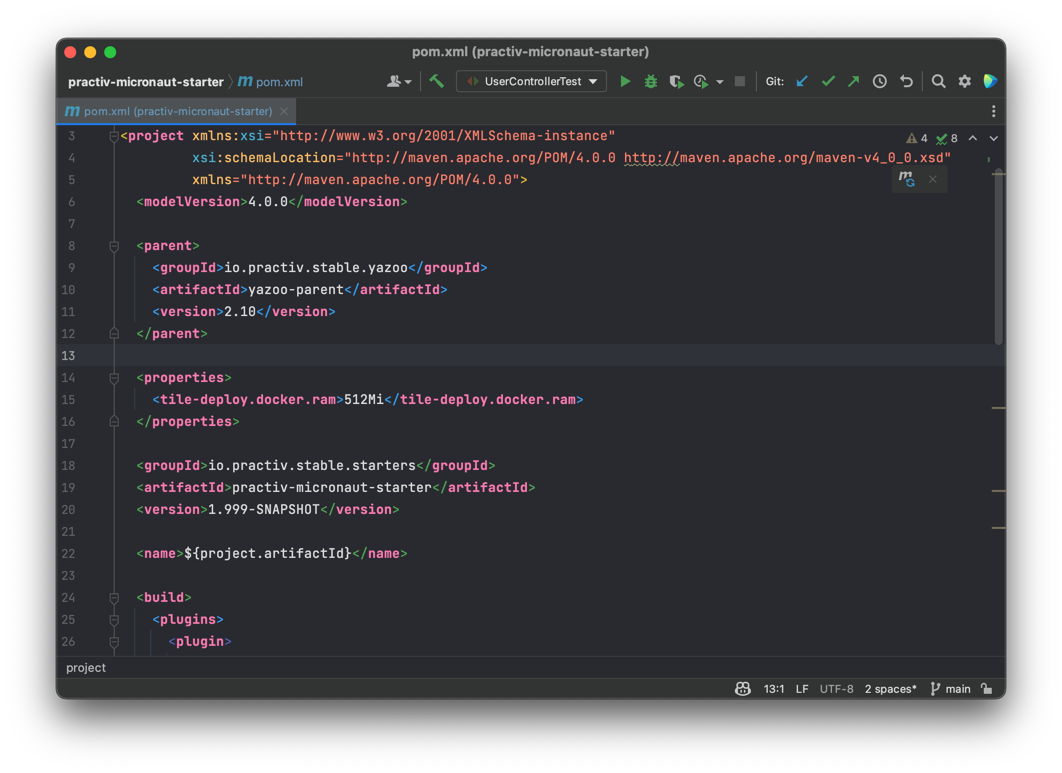
Open the pom.xml file in your favourite IDE.
The idea here is that all microservices will be built in a very similar way. Your pom.xml should be small and to the point.
Differences in pom.xml should be limited to dependent libraries in a perfect world.
Let’s break down how this app is built.
Parent POM
<parent>
  <groupId>io.practiv.stable.yazoo</groupId>
  <artifactId>yazoo-parent</artifactId>
  <version>2.10</version>
</parent>
This is the single parent pom. It contains very basic info used to build our services. This includes:
- Maven compiler source java version
- Build target directory
/target - Build plugin used to enforce that the correct build tile is included
The preference here is that we rely on very lightweight parent poms, and that the bulk of the build configuration is done in the build tile section. This allows us to use composition of build plugins rather than parent pom inheritance.
This is a very powerful feature that we will go into more detail on later.
Properties
<properties>
  <tile-deploy.docker.ram>512Mi</tile-deploy.docker.ram>
</properties>
We can define any properties for our application here. The build plugins will leverage these properties during the build process.
This example for instance, will set the amount of RAM to allocate to the docker container to 512Mi.
This is directly plugged into our generated deployment.yaml that will be used to deploy the service to Kubernetes later.
Build Tiles
A build tile is one to many Maven plugins that have been bundled as a consumable artifact. This allows us to ‘plug and play’ different build logic into our build process without having to juggle multiple parent POMs.
Let’s break down each tile here.
<build>
  <plugins>
    <plugin>
      <groupId>io.repaint.maven</groupId>
      <artifactId>tiles-maven-plugin</artifactId>
      <version>2.27</version>
      <configuration>
        <tiles>
          <tile>io.practiv.stable.yazoo:yazoo-tile-build:[1,2)</tile>
          <tile>io.practiv.stable.tile:practiv-tile-changes:[3,4)</tile>
          <tile>io.practiv.stable.chalk:chalk-micronaut-v3:[4,5)</tile>
        </tiles>
      </configuration>
    </plugin>
  </plugins>
</build>
yazoo-tile-build
This tile is responsible for defining core properties for the build, such as:
- Git base url
- branchoutName (the name of the branchout control project)
- downloadDockerRegistry (the docker registry to download images from)
It also defines the maven repository url (nexus in this case), used for releases.
This tile plugin isn’t public, and generally we would recommend forking our example tile for your own services.
practiv-tile-changes
This enforces change notes to be included in your project. It is optional, but recommended.
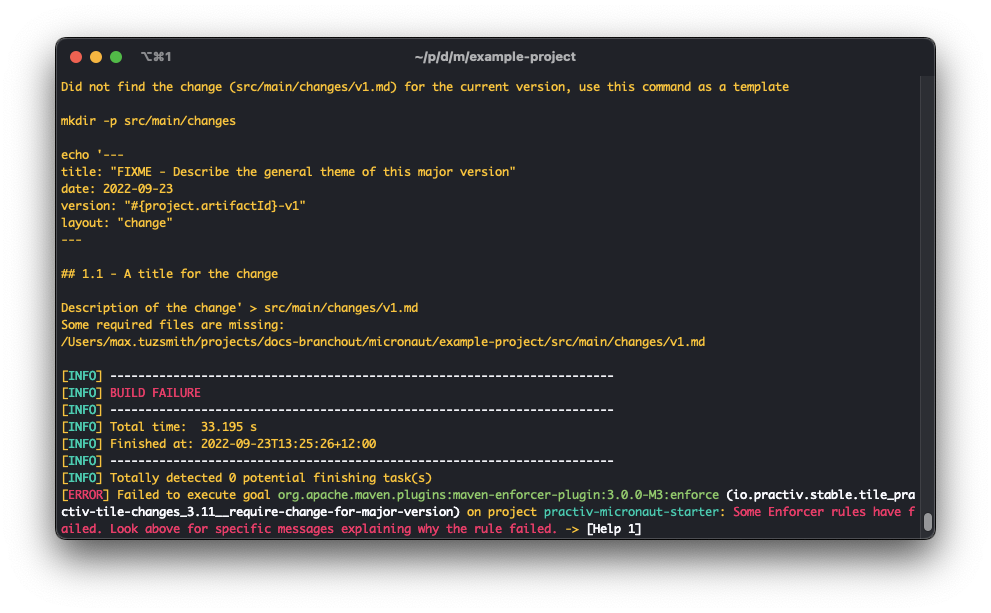
With this tile included, it will enforce that the directory src/main/changes exists, and that it contains a file for the latest major version.
Builds will fail if this is not the case, and output information around how you can satisfy this constraint.

Practiv supplies internal docs rollup, so this tile is quite useful if you want to keep track of changes across your services and view those changes in a single place.
chalk-micronaut-v3
This is what we refer to as a “tileset”.
It serves as a good example of how you can compose multiple tiles together. As Micronaut based apps are all built in a very similar way, we can bundle all the required build steps into this tileset.
This means that when we do upgrades, it makes it trivial to upgrade the build processes for all our apps in a single place, as opposed to juggling the same build steps individually across many services.
Maven dependencies
<dependency>
  <groupId>io.practiv.stable.flint</groupId>
  <artifactId>flint-apputils</artifactId>
  <version>[12,13)</version>
</dependency>
Entirely optional, but a pattern often used is to bundle all common framework logic, such as web handlers for health checks, and config management into a single dependency.
The flint-apputils dependency for instance will do the following:
- Set up reading of yaml properties files
- Create
/healthzand/versionendpoints for your app- Kubernetes deployments automatically are configured to look for these endpoints
- Set up application bootstrapping (
Application.start()) - Provide library dependencies for common libraries used (SpringBoot core libs or Micronaut core libs for instance)
Now, this isn’t strictly necessary, but why define and maintain this on a per service basis when you can do it once and reuse it across all your services?
In this case, it’s our only main-scoped dependency required for our entire application to run.
<dependency>
  <groupId>io.practiv.stable.composite</groupId>
  <artifactId>practiv-composite-micronaut-unittest</artifactId>
  <version>[6,7)</version>
  <scope>test</scope>
</dependency>
<dependency>
  <groupId>io.rest-assured</groupId>
  <artifactId>rest-assured</artifactId>
  <version>5.2.0</version>
  <scope>test</scope>
</dependency>
These are our test dependencies. We use the practiv-composite-micronaut-unittest dependency to provide all base testing libraries to the application under the test scope.
Rest assured was included as an example of how to include a dependency that is not part of the Practiv stable library.
As an example, if rest assured is something you choose for web handler testing across all your RESTful services, you may want to consider building your own testing composite layer, as opposed to including this in each of your services.
Read dependency composition for more information on this topic.
Conclusion
In this tutorial, we’ve covered the basics of how to get started with building a microservice.
This is an exciting topic, and there is more to it than what we’ve covered here.
Next we’ll cover building this app, and iterating it locally within Kubernetes.
See Developing for Kubernetes to get started!